
This post may contains affiliate links which means I may receive a commission from purchases made through links. Learn more from affiliate policy page.
Table of Contents
Do you wish to know how to detach a smoke detector? Yes, Removing an old or faulty smoke alarm from the ceiling or wall can feel intimidating.
But with the right tools and a basic understanding of the steps involved, homeowners can safely detach smoke detectors themselves.
After a late-night false alarm woke up my entire family, I knew it was finally time to replace our aging smoke detector.
Once I followed some simple steps to turn off the power, release the locking mechanism, and disconnect the wiring, the removal process was quick and painless.
Throughout this article, I’ll be providing you with my simple step-by-step instructions, you’ll be swapping out smoke detectors like a pro in no time.
Let’s get started!
How to Detach a Smoke Detector: 4 Steps
- Step 1: Turn Off the Power
- Step 2: Locate and Unlock the Mounting Mechanism
- Step 3: Disconnect the Wiring
- Step 4 (Optional): Install a New Smoke Detector
Step 1: Turn Off the Power
Before detaching your smoke detector, you need to shut off power to avoid getting shocked. Trust me, you do NOT want to learn what an electrical jolt from a live wire feels like!
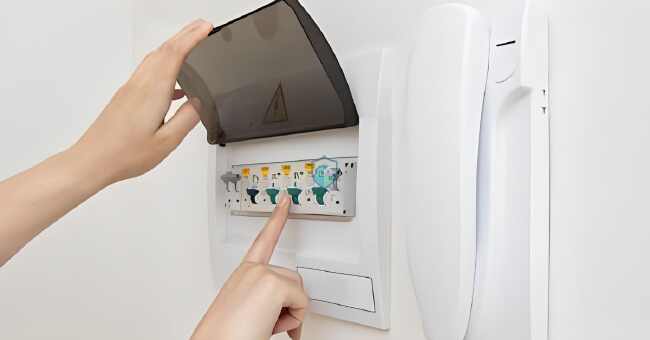
The safest way to turn off power is to flip the smoke detector circuit breaker in your electrical panel box.
This will cut electricity to the entire smoke detector circuit in your home.
To find the right breaker:
- Head to your breaker box, usually located in the basement, garage, or laundry room
- Identify the circuit labeled for smoke alarms (or fire alarms). It may just say “smoke” or something similar.
- Double check by flipping the breaker off and making sure your existing smoke detectors no longer light up. Don’t forget to flip it back on for now!
- PHOTO of circuit breaker box
Once you’ve confirmed the correct circuit breaker, turn it OFF before moving on. Safety first!
I also recommend turning off the main power shutoff switch as an extra precaution.
Then verify power is off by pressing the smoke detector test button. If the alarm doesn’t sound, you’re ready for the next step!
Step 2: Locate and Unlock the Mounting Mechanism
Next, you need to detach the smoke detector from the ceiling or wall mount. But first, take a close look at how it’s currently attached.
There should be alignment marks between the detector and the mounting plate or bracket. These allow you to align the lock when reinstalling a new detector later on.
Here’s what to look for:
- A mark, usually a small line, on the perimeter of the smoke detector
- A corresponding mark on the mounting plate
You want to rotate the detector clockwise to align these marks, which will unlock it. Typically, you’ll need to turn it around 1 inch.
If it doesn’t budge, there may be a locking pin installed as an additional safety measure.
Check around the perimeter of the detector for a small plastic pin, often red but sometimes other colors. Remove this pin first before trying to rotate the detector again.
Step 3: Disconnect the Wiring
Once detached, you’ll see wires connecting the smoke detector to your home’s electrical system. Don’t worry – they usually aren’t difficult to unplug.
There are two main types of connectors you may find:
Squeeze Tabs
This style has two small tabs on the sides of the plug. Simply squeeze them toward each other and pull the connector away from the detector.
To disconnect:
- Locate the two squeeze tabs on the sides of the plug
- Push the tabs in toward each other
- Pull the connector away from the smoke detector wires
Locking Hooks
Alternatively, your plug may have hooks that clasp it into place. Find the hooks and press them together to release the connector.
To disconnect:
- Find the two locking hooks on the plug
- Pinch them together
- Remove the connector from the detector
Once you’vereleased the plug, disconnect it and set the wiring aside. You’ll reconnect these wires to the new smoke detector later.
Step 4 (Optional): Install a New Smoke Detector
If you’ll be replacing the smoke detector right away, the wiring is already in place to connect a new alarm.
To install a new hardwired smoke detector:
- Connect the wiring plug to the terminals on the back of the new detector (follow diagram instructions)
- Attach the detector to the mounting plate by turning 1 inch counterclockwise
- The alignment marks should now line up to lock it in place
- Replace the locking pin if needed for extra security
And that’s it – you’ve officially upgraded your smoke alarm! The last step is to turn the power back on at the breaker box and test your new detector.
You should immediately hear the smoke alarm sound once electricity is restored.
Tips for Purchasing a New Smoke Detector
Upgrading your old smoke detector is one of the best ways to protect your home and family from fires. But with so many options out there, how do you choose?
Here are my top tips for picking the perfect new alarm:
- Hardwired vs battery-powered: Hardwired alarms are more reliable since they’re constantly powered. But battery-powered models are easier to install.
- Smoke vs combo detectors: Smoke alarms detect smoke while combo alarms also detect carbon monoxide. I recommend combo for whole-home coverage.
- Smart capabilities: Look for a smart home smoke detector if you want mobile app connectivity, smart alerts, voice control, and other cool features.
- 10-year vs long-life: You’ll need to replace alarms less often if you opt for a 10-year or even 20-year long-life smoke alarm.
- Brand name: Stick with reputable brands like Kidde, First Alert, Nest, or Honeywell. Check consumer reports for quality comparisons.
- Multiple alarms: Install a smoke detector on every level of your home and inside every bedroom for full fire protection.
And of course, make sure any model you choose is approved and listed by a qualified testing laboratory.
FAQs About Smoke Detector Removal
Here are answers to some frequently asked questions about detaching smoke alarms:
What tools do I need?
- Circuit tester, Phillips screwdriver, needle nose pliers, stepladder
How do I remove a smoke detector attached to the ceiling?
- Rotate it clockwise to detach from the mount, just like one attached to a wall
What if I can’t find the circuit breaker?
- Shut off main power cut-off switch as an alternate option
Is it okay to leave wires hanging when I remove the detector?
- Yes, you can leave them disconnected temporarily if replacing soon
Can I plug in a new battery-operated alarm?
- Absolutely, just make sure to reconnect wires later if converting to battery
How can I stop nuisance alarms?
- Clean detector, relocate away from kitchens, install photoelectric type
How often should smoke alarms be replaced?
- Replace alarms every 8-10 years at a minimum
Why won’t my smoke detector stop beeping?
- Low battery, dirty sensor, or expiration – replacing is often easiest fix
What type of smoke detector do I have?
There are a few ways to tell what type of smoke detector you have installed in your home:
- Look at the power source – If there are wires coming out of the back or side, you likely have a hardwired smoke detector. These connect directly to your home’s electrical system. If it only has a battery compartment, it’s a battery-powered detector.
- Check for a mounting bracket – Hardwired smoke detectors will have a mounting plate or bracket that’s screwed into the ceiling or wall. Battery-powered models may have a mounting bracket or they may just attach directly to the surface.
- Inspect the back or side – There are usually product labels, brand information, or specification details printed somewhere on the detector. You can also look for a wire connector or terminal block.
- Refer to the user manual – If you still can’t determine the type, refer to the manufacturer’s manual for your smoke detector model. This should clearly specify whether it’s battery-powered, hardwired, or dual-power.
How do I disconnect the wiring?
Disconnecting the wiring from a hardwired smoke detector is actually pretty straightforward. Here are the basic steps:
- Turn off power to the detector at the circuit breaker panel, for safety.
- Remove the detector from the ceiling/wall mounting plate.
- Look for a small rectangular plastic connector plugged into the back or side.
- Find the locking tabs on either side of the connector and press them in simultaneously.
- While holding the tabs, gently pull the connector away to unplug it from the detector.
- Make note of the wire colors and terminal locations to help with reinstallation later.
And that’s it! The wiring can hang loose until you’re ready to connect a new detector. Just be sure to turn the power back on and test it out when done.
What are the different types of smoke detectors?
There are 3 main technologies used in smoke detectors today:
- Ionization – Best at detecting fast-burning fires; prone to nuisance alarms
- Photoelectric – Great at detecting slow, smoldering fires; fewer false alarms
- Dual Sensor – Contains both ionization and photoelectric sensors in one unit
Here are the key differences:
- Ionization models are better for kitchens, bathrooms and areas with potential nuisance alarms. Photoelectric excels in bedrooms, living spaces and areas with combustible materials.
- Dual sensor detectors combine both technologies to provide enhanced sensing. They detect both flame and smoldering fires.
- Smoke alarms should be based on placement within the home. Having both technologies provides full fire detection coverage.
New dual sensor models are the best all-around choice in most cases. But standalone ionization and photoelectric detectors still have their benefits in specific areas.
Where is the best place to install smoke detectors?
The ideal smoke detector placement depends on your home’s layout. Here are some best practices to follow:
- Install a detector in every bedroom. Fires often start at night, so this helps ensure you wake up.
- Put an alarm on every level of the home. Smoke rises, so multiple floors need coverage.
- Add detectors near any staircases. This alerts you quickly if smoke is spreading between floors.
- Cover living spaces and lounges. Fires can start anywhere, so even open concept first floor areas need detection.
- Avoid kitchens and bathrooms if possible. Smoke from cooking and steam from showers can trigger false alarms.
- Place near, but not directly inside air ducts or vents. Airflow can delay detection, but alarms need some airflow to operate best.
- Mount on the ceiling in center of room for optimal smoke sensing in all directions. Wall mounting is OK too.
Conclusion
Detaching smoke detectors doesn’t need to be difficult or dangerous with the right precautions.
Just be sure to turn off power, properly disconnect any wiring, and refer to the manufacturer’s instructions for your specific model.
With some basic DIY skills and my tips above, you can swap out old or problematic smoke alarms for new ones in no time.
Improving your home’s smoke detection helps keep your family safe. I hope this gives you the confidence to upgrade your alarms!