This post may contains affiliate links which means I may receive a commission from purchases made through links. Learn more from affiliate policy page.
Table of Contents
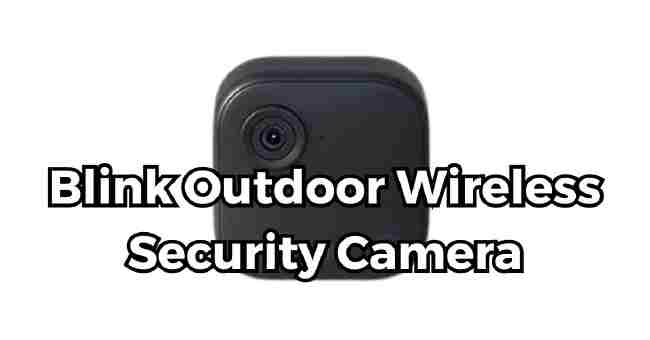
If you’re wondering whether Blink Outdoor Wireless Security camera system is right for your specific home security needs, you’ve come to the right place.
From unboxing the weatherproof cameras to mounting them outside my home, I recently put Blink’s Outdoor kit through extensive first-hand testing to highlight all capabilities, controls and real-world performance.
Through my in-depth review ahead, you’ll discover key facts like the sync module functions, customizable app alerts, video quality results and battery expectations – including a few limitations that surprised me.
Most importantly, I reveal if the convenience of wire-free installation combined with sharp HD surveillance makes Blink’s cameras a smart monitoring investment or not.
So in this guide, you’ll learn:
- Key benefits of the Blink Outdoor system
- My experience getting set up from unboxing to installation
- An in-depth tour of the Blink app controls and features
- How well it handles HD recording, motion detection and battery life
- Limitations to be aware of
- And most importantly – are these cameras worth buying?
Let’s get started.
Key Standout Features of This Battery-Powered Camera
What exactly makes the Blink Outdoor camera different than most outdoor security options out there?
Here are some of its most useful features:
- Completely Wireless Installation: No electrical or drilling work needed outdoors. The wireless sync module connects to Wi-Fi so cameras just need mounting.
- Long-Lasting Battery Life: Two AA lithium batteries last for about 2 years!
- Weatherproof and Durable Build: Withstands dust, rain and temperature swings from -4° to 113°F.
- Sharp and Clear 1080p Video: Records crisp HD video day or night with infrared night vision tech.
- Wide 110° Field of View Lens: Sees more of your yard or property in the camera frame.
- Customizable Motion Zones: Only get alerts when movement is detected in key areas you want to watch.
Having both flexibility around placement and long-term performance without constant battery swaps seemed very appealing to me.
Now let’s unbox these cameras.
Unboxing Blink Outdoor Wireless Security Camera and My Initial Impressions
My order of one Blink Outdoor camera plus the Sync Module 2 system kit arrived in simple packaging. Opening it up, here’s exactly what comes inside:
- 1x Blink Outdoor camera
- 2x AA Lithium batteries
- 1x Mounting kit
- 1x Screwdriver
- 1x Sync Module 2 (3rd gen)
- 1x Power cable for sync module
- 1x Ethernet cable
Right away, the camera felt well-built and sturdy in hand – constructed from black plastic strengthened by an inner metal plate.
Weighing under 1 lb with batteries inserted, it doesn’t feel too heavy to mount in various spots.
The sync module is also compact – sized like two smartphone stacked. This central hub manages connecting all your Blink devices to the WiFi and to the cloud.
One notable first impression was seeing the claimed 2 year battery life for the Blink Outdoor. I planned to validate if that holds up down the road.
Now that I had all the hardware, it was time for my least favorite part…installation and setup.
My Step-By-Step Guide to Getting Blink’s Outdoor System Up And Running
Installing the Blink Outdoor system involved a few key steps:
- Connecting the sync module to my home WiFi
- Mounting the outdoor camera where I wanted it
- Syncing the camera to the Blink app and my account
Let’s walk through what this setup was like:
Connecting the Sync Module 2 to My WiFi Network
First I needed to connect the included Sync Module 2 to power and my home WiFi router using the provided cable.
The Sync Module 2 acts as the smart hub and bridge between the Blink cameras and the cloud.
With the 3rd gen model, it has double the WiFi range (over 100 feet) and supports more cameras than before. There’s also a local storage option.
Connecting it was very straightforward:
- Plug the sync module into an indoor power outlet near your router using the 6 foot cable.
- Use the included ethernet cable to connect from any port on your router to the sync module’s ethernet port
- The module’s LED will blink blue when booting up and connected to the local network.
That’s it. The sync module just needs continuous power – it will automatically connect devices to WiFi without needing to press buttons or configure settings.
Next was time to mount my first Blink camera…
Mounting Locations I Chose for My Blink Outdoor Cams
When scoping out mounting spots, keep in mind that the Blink Outdoor has an impressive night vision range of about 30 feet.
But the 110° field of view still limits visibility from a single point.
For full coverage, you need multiple cameras positioned to reduce blind spots on your property.
Here’s where I mounted my first Blink Outdoor cam:
- Above my garage overlooking the driveway and backyard
This gave a wide shot of almost my whole back perimeter where windows or doors could be vulnerable.
Later on, I added two more Blink Outdoor cameras mounted here:
- Beside my front door watching the walkway
- On the backyard fence monitoring the gate and side yard
Tip: Use the Blink app’s viewfinder mode before drilling holes to preview the camera angle.
Mounting and Aiming the Wireless Camera
With locations set, I used the included mount and screws to securely attach my first Blink Outdoor to the garage exterior about 8 ft high.
The camera mount uses a versatile swiveling ball joint. This let me easily adjust the vertical and horizontal angle post-mounting to fine tune the view.
Blink includes a 30° angled mount in the box too. I didn’t need it, but this can help point cameras directly downwards if desired.
Run the USB cable through the mount slot to Keep wiring neat before screwing it into position.
Lastly, slide on the external camera skin once angled correctly to protect the housing.
When powered on later, I used the app’s viewfinder to make final pan and tilt tweaks to the angle.
Then I repeated the same process to mount the two additional Outdoor cameras on other sides of my home.
Connecting the Cameras to WiFi and My Blink Account
With all cameras mounted, it was time to connect them to the sync module’s WiFi signal and my account.
Adding them was a cinch thanks to Blink’s hassle-free wireless setup.
Here are the simple steps to connect each Blink Outdoor camera:
- Insert the included lithium AA batteries
- Open the Blink Home Monitor app and log into my account
- Tap the “+” icon and select Add Blink Camera
- Put the camera into “sync” mode by holding the Setup button
Once detected, I assigned each camera a name and room then let the app finish syncing.
And…done.
The whole process took under 5 minutes per camera with no wiring headaches.
Now to explore what features this system offers for securing my home.
Blink App Tour: Key Controls and Functions
The Blink Home Monitor app is central for controlling your cameras and customizing your system’s security settings.
Let’s check out the main sections of the app and what you can do:
Live View From Anywhere with Two-Way Talk
Like most camera apps, Blink offers real-time live view on demand – great for quickly peeking in whenever.
While streaming video, you can use two-way talk through the camera’s built-in microphone and speaker. I don’t use it much but handy for shooing stray cats off my patio furniture.
Note that live view does drain the camera batteries faster when used extensively.
Adjusting Detection Settings to Reduce False Alerts
One major advantage of having outdoor cameras is getting alerts when something moves or enters the monitored zone.
But you only want notifications if intruders trip the sensor – not windblown branches.
So the app lets you define customizable motion zones where detection gets triggered. You simply draw the active area box on the camera’s view.
This really cuts down on false motion alerts.
You can also tweak motion sensitivity higher or lower as needed.
For my driveway camera, I only activate the bottom half to ignore tree movement up above for example.
Video and Alert History Stored in the Cloud
All motion events the Blink cameras capture get uploaded to secure cloud storage linked to your account.
You can review detection history in the app going back hours, days or weeks. It includes still snapshots and 10-15 second video clips.
The basic plan covers:
- Storage for the last 7 days
- Unlimited video clips
- Unlimited cameras
I opted for their 30-day extended cloud storage for just $3/month. Worth it for accessing older footage if needed to settle disputes with Amazon delivery drivers about missing packages.
FAQs
Does Blink Outdoor Camera Have A Monthly Fee?
No, the Blink Outdoor camera itself does not require an ongoing monthly fee. One of the appeals of Blink’s 100% wireless outdoor security cameras is that the hardware and basic features are available without a subscription.
You can view live footage, get customizable motion alerts, and access the last 7 days of video history completely for free with the Blink sync module after buying the cameras.
They do offer optional plans like 60-day video storage for $3/month or professional monitoring for $10/month. But these are optional upgrades if you want to expand capabilities down the road.
The cameras are usable long-term just as they are out of the box!
Can Blink Outdoor Cameras Work Without Wi-Fi?
Since everything is self-contained in the camera housing, Blink can operate without any hardwired internet.
But the system does require a WiFi connection to fully function. Here’s how it works:
The included Blink Sync Module that comes with the cameras needs to remain connected to your home WiFi router. This allows it to communicate with the app and securely store videos in the cloud.
The cameras then connect wirelessly to grab internet through that Sync Module’s own independent WiFi network whenever they detect motion.
So without a Sync Module linked to your home WiFi network, the cameras won’t be able to stream video to the cloud or send alerts.
But their other functions like recording clips locally, live view, motion sensor etc will still work – just not remotely.
How Long Does Blink Outdoor Camera Last?
The battery life is one of the strengths of the Blink Outdoor camera system. According to Blink, a single set of the two included lithium AA batteries will last for about two years.
This is based on typical conditions with moderate motion events each day. Extreme weather conditions or installing in a high traffic area can impact longevity.
But most users report their Blink Outdoor cameras achieving around 18-24 months per charge – surpassing expectations! Just make sure blink is set to optimal battery settings.
I’ve had mine over 5 months now and battery level still shows 100%. Since they’re wireless and weather sealed, replacing the batteries is straightforward whenever needed.
How Far Will A Blink Outdoor Camera Work?
The wireless range for the Blink Outdoor depends which aspect you’re referring to:
WiFi Range: With the Sync Module 2, Blink cameras can maintain a WiFi connection up to 100 feet away. So no worries about distance from your router.
Motion Detection Range: The passive infrared sensor can detect movement reliably starting around 15 feet away. Sensitivity and range can vary based on external factors.
Night Vision Range: In infrared mode, the camera can capture video clearly in black and white starting from around 5-6 feet out. Maximum night vision reach is about 30 feet out.
So while fairly compact, the detection coverage from each camera is quite extensive! Strategically positioning them eliminates major blind spots.
Do Blink Cameras Have Night Vision?
Yes, the key to reliable outdoor security is being able to monitor your property around the clock. Blink Outdoor cameras do have infrared LEDs built-in for black & white night vision abilities.
This allows capturing video even in complete darkness without any ambient light.
While color night vision would offer clearer detail, the infrared is decent for basic motion detection. Just don’t expect to read license plates at 60 feet.
Between the 850nm LEDs and light-sensitive CMOS sensor, the cameras can record discernible footage around your home any time of day or night.
How Far Can Blink Cameras See At Night?
As mentioned above in the previous answer, the practical night vision range for Blink Outdoor cameras is approximately 30 feet.
You’ll start getting usable video around the 5-6 foot mark where you can make out objects and people. Quality and brightness increases closer up and peaks at 30 feet out.
While some higher-end standalone cameras may boast double the range, 30 feet is actually quite generous coverage for most homes.
Pro-tip: Mount your cameras 7-9 feet high looking slightly downwards to maximize how far infrared light will travel across your lawn or perimeter.
Do Blink Outdoor Cameras Have Audio?
Yes, all Blink Outdoor cameras are equipped with two-way audio using built-in microphones and speakers.
This means not only can the camera capture and record audio when motion events occur, you can also talk through the Blink app to whoever is on the other end.
It offers crisp and fairly loud sound in both directions making it handy for quick conversations, warnings if suspicious activity is detected or deterring intruders.
Two-way talk combined with the live view feed lets you immediately investigate unusual motion alerts verbally when needed.
Just note that extensive audio streaming will deplete the camera battery quicker.
Where Is The Best Place To Put A Blink Camera?
Ideal placement for your Blink Outdoor cameras depends on your property layout and security priorities around potential entry points or high-value assets.
But here are some general tips on where cameras can serve you best:
- Facing driveways, front walkways or backyard gates
- Watching garage doors and perimeter fences
- Overlooking patio areas, hot tubs or pool zones
- Guarding side/backyard access points like gates or cellar doors
- Monitoring vehicle parking spots susceptible to break-ins
Think about vulnerable zones a intruder may approach and get cameras covering as many likely angles as your budget allows!
Can You Watch Blink Camera Live?
Yes, the Blink app makes it easy to pull up a live stream view from any connected cameras on demand. Just launch the app, select the camera you want to monitor and tap “Live View”.
This will instantly show real-time video from that camera’s perspective using your home or mobile internet connection.
Handy for quick check-ins anytime something seems amiss based on alerts or just to peek at deliveries. Streaming does use more battery than standby mode but fully workable.
You can even setup “Live View” shortcuts with Alexa voice controls to call up feeds on your Echo Show or Fire TV.
So you are not limited to only reviewing past motion events – live viewing capabilities are very flexible.
How Do I Make My Blink Camera Record Longer?
By default, the Blink Outdoor cameras capture 10-15 second video clips whenever motion is triggered. But you can easily extend the recording duration up to 60 seconds:
- Open the Blink app settings
- Tap Video Settings
- Under “Video Clip Length” choose 30 or 60 seconds
Using Extended Video mode does use more battery life than standard short captures. So I recommend only using it temporarily if monitoring a high priority area.
But having the option for longer 1 minute clips gives you more context into each motion event that transpires.
Conclusion
To wrap up, we’ve covered a lot of ground when it comes to the Blink Outdoor camera’s design, setup, features and operation.
From my testing, it’s clear this affordable weatherproof camera line shines best for cost-conscious homeowners wanting sharp 1080p recording with responsive detection alerts.
Business owners should also shortlist it when seeking quick expanding video coverage across large properties without electrician or WiFi connection headaches. Just be sure to strategically place cameras in overlapping view zones.
If you value seamless smartphone access, flexible power options plus a scalable platform to grow – Blink Outdoor checks those boxes making it tough to beat for your first wireless surveillance rig.
