This post may contains affiliate links which means I may receive a commission from purchases made through links. Learn more from affiliate policy page.
Table of Contents
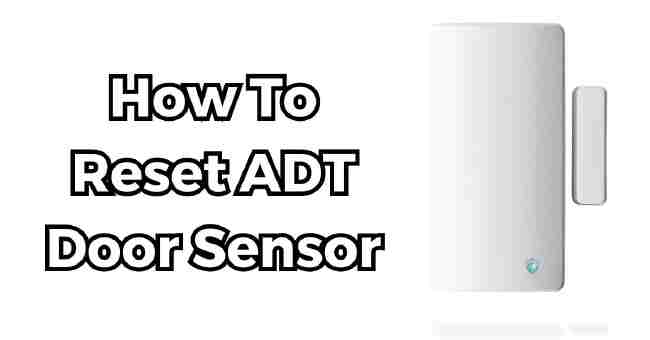
Are you wandering how to reset ADT door sensor that won’t stop beeping? Yes, to reset an ADT door sensor, you can follow these general steps based on the information from ADT’s official support and user guides.
Last winter, the ADT sensor on my back door started endlessly beeping when closed.
I relied on that sensor to alert me about intrusions when I was away – but now it cried wolf even when armed.
I tried replacing batteries and relocating it, but the frustrating false alarms continued. I feared disabling it and losing protection.
Then I discovered a little-known reset trick that finally silenced the beeps. After a few tries, the sensor behaved normally again.
I’ll share all the common problems and solutions, like physically resetting the sensors through small buttons, using your app for sensor resets, even advanced tips like range extension and firmware upgrades.
Read on to become a door sensor troubleshoot expert.
When Your ADT Sensor Needs a Reset
Before we dive into the step-by-step process of resetting sensors, let’s look at some signs your door or window sensor may need a reboot:
- Sensor shows open when door is physically closed – This false trigger often means low battery or range problems
- You receive “Sensor offline” or “Sensor error” alerts – if the sensor is no longer connecting to the main panel
- The sensor LED light is rapidly flashing red – Frequent red blinking means potential pairing issues
- Constant beeping or chirping from sensor – An audible cue that trouble is afoot!
Though occasional false alarms are no cause for panic, recurring issues mean investigating further. Start with simple battery or positioning changes.
But if problems linger more than a few days, a sensor reset should help.
When To Reset vs Replace Your Sensor
Reset if you see the issues above after previously normal performance.
Replace sensors that are damaged, over 5 years old, lack modern features, or don’t respond to troubleshooting. ADT has sensor replacement options available as well.
Now let’s explore step-by-step guides based on different reset scenarios:
How To Reset ADT Door Sensor: Resetting Your Sensor in the ADT App
The easiest and most common reset is performed directly within ADT’s app or web account. No tools required – just your fingers.
Follow these steps:
- Open up the ADT app and log in to your home account.
- Tap the “<<” Menu button in the upper left corner.
- Select Sensors from available menu options. This opens your sensor list.
- Tap Add/Edit Sensors at the bottom
- Locate the problem sensor and tap to open details.
- Tap the Unpair sensor button seen under troubleshooting options. This deletes and resets connection.
- Follow the prompts to re-pair the sensor, allowing a fresh sync with the panel.
That’s all it takes to fully reset connectivity using the app! Be patient during pairing – it may take a few tries to rediscover the sensor signal.
Pro Tip: While in sensor details, check for firmware updates. New versions improve performance and connectivity.
Troubleshooting Sensor Range Through ADT App
Beyond resets, the ADT app also displays your sensor’s “RSSI” signal strength. RSSI refers to “Received Signal Strength Indication” – basically telling you the sensor’s wireless performance.
Higher RSSI numbers (like -30) equal better range, while lower numbers (-70) mean potential disruption.
If your sensor resets don’t resolve connectivty issues, note the RSSI values:
- Ideal RSSI range: -30 to -70
- Consider repositioning sensor closer to hub at <-75
- Investigate interference below -80 RSSI
With detail insights like RSSI, the ADT app provides robust tools for monitoring sensor function. Utilize these mobile capabilities before calling in experts.
Manual Factory Reset for Sensors
For instances where sensors won’t sync to your app, panel hub, or show no signs of life at all, a manual factory reset is needed. It’s time to locate the small reset button discretely located on each sensor.
You’ll need:
- The non-functioning sensor
- Paperclip or pen tip
- Patience, this can be tedious.
Here are step-by-steps:
- Dislodge the sensor from door/window mount to access back panel and sides.
- Locate a small circular hole on one side, covered by seal (see photo). This protects reset trigger.

- Carefully push paperclip end or pen tip into hole to press and hold reset button (5-10 seconds).
- LED light will quickly flash when successful. Green ready to pair, red still rebooting.
- Attempt pairing to hub again. May require multiple resets and attempts.
Factory resets often help sensors recover from serious connection issues or firmware problems. And definitely extends their lifespan vs replacing right away.
Troubleshooting Sensor Range and Connectivity
Ah yes, the common “Sensor offline” alert resurfaces despite your reset efforts above.
Before calling ADT Customer Support, some self-checks regarding positioning and range can explain the temperamental behavior.
First, look into environmental factors causing interference:
- Nearby energy-gobbling appliances: Rotate sensor away from TVs, monitors, microwaves etc which emit radio frequency noise
- Thick walls, poor WiFi zones: Sensors rely on radio communication from hub. Find closer alternative mounts with better sightlines
- Weather conditions: Extreme cold, heat, and moisture impact wireless signals. Consider protective enclosures if outdoors
Finding the sweet spot balance between hub proximity and limiting barriers will boost reliability. Use the app’s RSSI signals to experiment with placements.
While testing, reference what different LED light indicators on sensors mean:
| Light Color | Meaning | Action |
|---|---|---|
| Green | Powered on, communicating | No action needed |
| Red | Loss of wireless signal | Move sensor location closer to hub |
| Flashing Red | Attempting panel synch | Allow 1 hour for pairing, continue troubleshooting if not paired |
| No light | Battery depleted | Replace battery immediately |
Use this light legend to understand current state and troubleshoot appropriately. Persistent red or no lights demand further resets and checks.
Advanced Sensor Replacement and Upgrades
When all else fails reviving worn sensors, replacement becomes unavoidable. Luckily secure ordering and installations are a cinch with ADT’s network.
Follow their guidance below when buying modern successors:
- Browse sensor options – Compare technical specs like battery life, detection ranges, smart integrations etc.
- Stick with reputable ADT models – Aftermarket devices cause headaches regarding assay and compatibility.
- Consider professionally monitored sensors – Upgrades like cellular or integrated alarm emitters boost security.
- Schedule pro install – Let experts handle finicky WiFi coding and hub synchronizations (fee applicable).
While pricier than DIY, advanced sensors provide peace of mind from bugs and faults.
And professional monitoring ties events directly to ADT response centers – no smartphone app needed.
Invest in these upgraded lines when replacing faulty old models:
- ADT Door/Window Sensors (Gen 1)
- ADT Door/Window Sensors (Gen 2)
- ADT Glass Break Sensors
- ADT Smoke/Heat/Freeze Sensors
- ADT Water and Flood Sensors
Review the security sensor purchasing guide to select which enhanced detections work for your home.
ADT Sensor Best Practices
Let’s wrap up with key learnings for keeping sensors in good working order:
Conduct regular open/close tests – Manually trigger sensors routinely to catch potential failures early
Change batteries every 1-2 years – Replace before low battery warnings if possible
Consider tamper-proof models – Detect break-in attempts to physically disable sensors from triggering properly
Check app and emails for notices – Get ahead of technical faults being reported from panel
Call ADT Customer Support – When you’ve exhausted DIY troubleshooting, agents can assess replacement needs
Register devices upon purchase – Extend device warranty periods via product registration
Enable automatic firmware updates – Stop bugs in their tracks and access new features
Future-proof your setup – Ensure hub, panel, and sensors stay compatible as smart home tech keeps advancing
By leaning into preventative maintenance and leveraging ADT’s safety ecosystem, you’ll avoid losing sleep each time a sensor goes offline.
FAQs
Why Is My Adt Door Sensor Not Working?
There are a few common reasons why your ADT door sensor may stop working properly.
The most likely culprits are a depleted battery, position outside of range from the ADT Security hub, interference from other devices, or a software/pairing issue.
Start troubleshooting by replacing the battery with a fresh CR123A lithium battery. Also try repositioning the sensor closer to the hub and away from electronics that may cause wireless interference.
You can use the ADT app to view the sensor’s signal strength reading (RSSI) to find an optimal location.
If that doesn’t restore functionality, you may need to factory reset the sensor. Carefully press the small reset pinhole on the back with a paperclip for 10+ seconds until the LED blinks.
Then attempt re-pairing in the ADT app. If problems persist, contact ADT Customer Service to confirm whether a replacement part may be needed.
How Do You Remove An Adt Door Sensor?
It’s quick and simple to detach an ADT door/window sensor for replacement or to disable security monitoring.
Start by gently pulling the main sensor housing away from the door frame to release the 3M adhesive. Avoid tugging on the thin wire that connects both halves.
Next, separate the magnet piece from the fixed door frame or window. With both sensor halves detached, you can now uninstall batteries or power down completely.
Important: If professionally monitored, call ADT to update equipment status if disabling sensors. Also properly dispose of lithium polymer batteries.
Why Is My Front Door Alarm Sensor Not Working?
Issues with your front door ADT sensor likely stem from placement, power, or connectivity problems.
Being the furthest point from the security system panel, the distance strains communication reliability.
First, check that the sensor light is illuminated (green is optimal). No light means it’s time for a new CR123 battery.
Next inspect both halves are aligned with no obstructions. Misalignments from door settling or bumps trigger false alarms.
If properly positioned and powered, attempt sensor factory resets detailed above. Also consider an ADT wireless range extender placed midway in your home to boost signal strength to distant door sensors.
How Do I Reset My Adt Sensor After Replacing The Battery?
After swapping in a new batteries in ADT sensors, a manual reset often helps re-establish connectivity.
Here are the steps:
- Install fresh battery, observing proper polarity alignment
- Locate small reset pinhole on the sensor’s exterior
- Use a paperclip to press and hold for 10+ seconds
- Watch for LED to flash, indicating successful reset
- Open/close door to trigger sensor and confirm detection signals
Resetting reboots the sensor’s electronics and clears any residual power issues interrupting the device. Try this after any battery swap before attempting sensor pairing again.
How Do I Reset My Adt Blue Door Sensor?
ADT Blue sensors follow the same reset procedure as standard ADT security sensors. The key difference is utilizing the Blue by ADT app for pairing vs the standard ADT app.
Here are condensed Blue sensor reset steps:
- Remove battery
- Insert new CR123 battery
- Locate and long-press small reset pinhole with paperclip
- Open Blue by ADT app to add device
- Sync to ADT Blue Gateway when discovered
Resets give fresh starts for power and connectivity. Tuck Blue sensors into included range extender outlets if having wireless distance issues.
How Do You Fix An Adt Sensor?
To fix an ADT sensor that is unresponsive or demonstrating errors, there are a sequence of troubleshooting steps:
- Replace non-rechargeable battery
- Physically inspect for damage preventing door/window alignment
- Manually reset by pressing interior pinhole
- Change sensor location closer to ADT security panel
- Update sensor firmware via ADT app
- Ultimately replace sensor entirely if other steps fail
Taking this staged approach helps isolate whether software glitches, power deficiencies, or hardware fatigue is causing the problems.
Reliable sensors are critical for ADT performance, so fix issues promptly.
How Do I Reset My Adt Front Door Camera?
Resetting ADT front door cameras gets a bit more complex than the sensors since it involves wired low-voltage connections.
Start by locating the camera power adapter connection, then:
- Unplug the adapter from both electrical and camera ports
- Wait 30 seconds for residual energy to dissipate
- Reinsert the adapter firmly back into camera and outlet
- Load ADT app to run connectivity diagnostic on camera
If outlet power is confirmed but camera doesn’t activate, try safe reboots of your broader ADT security system panel as well. Fully restoring equipment power cycles can clear up digital glitches.
How Do I Reset My Adt Touch Panel?
To reboot an ADT Command touch panel security hub:
- Locate small pinhole on the back panel labeled “Reset Button”
- Using a straightened paperclip, gently press and hold the reset button for 3-5 seconds
- When screen goes black, release reset button
- Home screen will reload, signaling successful touch panel reset
Resets tackle screen freezes and network connectivity issues. Log back into your ADT account afterward and enable features like video doorbell previews.
Can You Turn Off An Adt Sensor?
While ADT sensors can’t be powered down like light switches, you can disable security monitoring triggers through the app.
Tap into your sensor listing, select the target device, then toggle off alarm notifications.
This prevents errant detections from triggering sirens and alerts when intentionally opening doors/windows.
Just remember to re-enable trigger notifications when done. Glass break and smoke detectors should remain continually activated.
Do Adt Sensors Have Batteries?
Yes, standalone ADT door and window entry sensors rely entirely on replaceable CR123A lithium batteries to operate.
Battery lifespans average 1-2 years for most models. Newer generation sensors may utilize rechargeable batteries instead, but will include micro-USB ports for manual charging.
Pro Tip: Register all ADT security devices upon activation to receive expiration reminders for batteries, cellular backups, and warranty timelines.
How Do You Open An Adt Sensor?
ADT sensors feature tamper-resistant casing designs to prevent unauthorized device access and disablements.
But properly installed sensors can safely be opened during routine battery changes.
Locate the subtle seam lines along the sensor body perimeter. Firmly insert a flat head screwdriver into gaps to ply open the segmented front and back covers.
This avoids damage compared to blunt force. Carefully detach the circuit board then replace battery.
When closing, realign covers seam-to-seam and gently snap together via plastic locking tabs. Take care not to pinch wires while reassembling.
Conclusion
Resetting sensors through online apps or physical reset buttons gives new life to aging devices prone to false alarms.
Whether batteries need replacing or connectivity improves after a reboot, don’t tolerate dysfunctional security.
Beyond these DIY tips, consider upgrading sensors that still falter to maintain watchdog protection.
Stay vigilant against intrusions by keeping sensor hardware and software fresh. Finally, tap ADT technical support to investigate any lingering sensor mysteries that even resets can’t unravel.
